How To Make Reusable Fabric Gift Wrap
If your household is anything like our’s, then the lead up to Christmas can look like a wrapping frenzy at times – rolls of glitter paper, ribbon, tags and tape everywhere! The effort is always worth it once you see a pretty pile of thoughtfully wrapped gifts under the tree – it just adds to the excitement and anticipation of giving to your loved ones. However, once the big day rolls around, sadly all that paper heads for the bin – but that need not be the case!
Why Use Fabric Gift Wrap?
Fabric gift wrapping has been increasing in popularity in recent years, thanks to a renewed interest in craft–making and a movement towards reusable wrapping to reduce paper waste. Another appeal of fabric wrap is that the wrapping itself becomes part of the gift. The person receiving the gift can reuse the fabric and pass it on as part of a future gift. There are a number of simple, popular methods for using fabric as gift wrap, from the Japanese art of tying furoshiki cloths to easy-to-make fabric drawstring bags.
What Is Furoshiki?
The Japanese art of fabric gift wrapping – called furoshiki – stems from the 700's, when fabric cloths were used to wrap temple treasures for protection. During Japan’s Edo period, when public bathhouses became more accessible, people began using the practice of fabric tying to bundle their clothes together when they visited local baths. Today, furoshiki is enjoying a resurgence in popularity, not only in Japan but worldwide, due to our growing awareness of sustainable and reusable alternatives to paper wrap. Investigating the furoshiki trend last Christmas, The Guardian newspaper explained that, “both attractive and reusable, (furoshiki cloths) are increasingly being embraced by shoppers as a sustainable alternative to paper.” (Smith, Gwendolyn. "Why reusable cloth could consign Christmas gift wrap to the bin". 15th November 2020, The Guardian).
As fabric is easier to fold than paper, it can work better with trickier shaped items and the various techniques for folding fabric are straight-forward and quick to master. There is an abundance of furoshiki online tutorials, with some UK retailers even providing workshops for customers.

How To Make Your Own Furoshiki Wrap
Although furoshiki wrap uses a simple square shaped cloth, there is an endless array of creative possibilities to personalise and embellish your wrap. We recommend that the fabric is double-sided, as both sides will be visible when tied, so why not use contrasting prints and colours? The fabrics can be adorned with colourful ribbon, trims and seasonal botanicals to complement and finish the wrap in style.
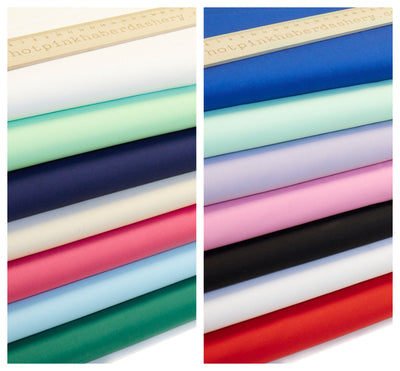
Select two pieces of fabric that aren’t too thick – such as our cotton poplins – so that the fabrics tie well when finished. Cut the fabrics to the same size, then lay the pieces together with the outer sides facing each other. Sew the edges together using a 1 cm seam and leave an 8 cm gap on one side. Now turn your fabrics the right side out, tuck in the seam at the gap and neatly press the edges. To finish and close the remaining gap, use a slight zigzag stitch to sew the edges from the outside. Press your furoshiki cloth once more to ensure it lays nicely flat and ready to wrap your gift!
How To Tie A Furoshiki Wrap Cloth
There are a number of ways to tie your furoshiki cloths, so it's worthwhile browsing some online tutorials to experiment with different tying methods.
A popular and very attractive technique, starts by laying your cloth flat on a solid surface and rotating the fabric so a corner is directly in front of you, making a diamond shape. Imagine a horizontal line crossing the fabric from the left to right corners at the side, then place the gift in the centre of the top half of the fabric, with the bottom edge of the gift against this imaginary line. Fold the fabric in half, by taking the bottom corner up & over the gift to meet the top corner. Now lift your gift and tuck this top triangle of fabric tightly behind the gift, so it starts to wrap the item. Take the top corner from the back of the fabric, pull it over the gift towards you and then underneath the item, to wrap it tightly. Your wrapped gift should now look like a rectangle with pointed corners at either side. Take the pointed corners, gently narrowing some of the fabric as you tie the pieces together in a double knot on top of your present. Make sure the ears of the knot neatly open and finish your beautiful furoshiki wrap with a sprig of holly, eucalyptus or anything else that takes your festive fancy!
How To Make Easy Drawstring Fabric Gift Bags
These are beautiful, quick–to–make gift bags that you and your loved ones can use time & again. As with the furoshiki wrap, they can be embellished with trims, botanicals and jingle bells for a festive finish.
Start your easy drawstring bag by cutting a rectangular piece of fabric proportionately to the dimensions of your gift. To do this, lay your gift on your fabric and allow about 4 cms of fabric either side of your gift (or more if your gift is quite wide). Next, measure the height of your rectangle by allowing twice the height of your gift plus an extra 12 cms so the bag can loosely close.
Lay your rectangle of fabric with the right side facing down and long edges on either side. Fold over 1 cm of fabric on one long side and press, then repeat on the opposite edge. On the shorter sides at the top and bottom, fold over the edge by 1 cm and press, then fold over again by 4cm, press and pin. These folds at the top and bottom of your rectangle will become the casing to your drawstring.
Using a sewing machine and matching thread, stitch both casing folds in place by putting the seam about 3.5 cm from the outer edge of the bag, so the drawstring will be able to move easily. Now it's time to bring your bag together! Fold your bag in half, with the right sides facing each other, matching up the casing edges and secure with pins. Next stitch the sides together, starting just below one casing, continuing along the pressed seams and finishing at the base of the casing on the opposite side. Turn your bag to the right side out, ready to add the final step!
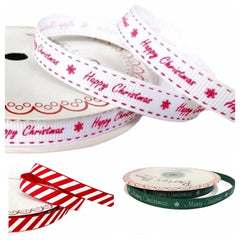
Cut a ribbon that is twice the width of the fabric plus about 12 cm (or more if you wish to tie with a bow). Put a safety pin through one end of the ribbon, threading your ribbon through one casing and returning the ribbon back through the opposite casing. Your gift bag is ready to carry its gift to your loved one. Pop the present inside, draw the ribbon together, tie and finish with a gift tag, jingle bells or holly!
How To Make Super Simple Fabric Gift Bags
If you’re short on time or need to make a lot of bags quickly, this is the perfect solution! Start by cutting a rectangle of fabric – your rectangle should measure the width of your gift plus about 4 cm and twice the height of your gift plus about 10 cm. Place the fabric right side down, folding over the shorter top and bottom edges by 1 cm and press. Fold these edges over again by about 2 cm, press and, using a matching sew all thread, stitch the top and bottom seams. Next, fold your bag in half with the right sides facing each other, press and pin together. Take your ribbon or trim and fold in half. Pop the middle of the ribbon (about 1 cm) between the two seams at 4 cm below the top of the bag, ensuring the rest of the ribbon is between the right sides of the bag. Finish the bag, by stitching the side seams together, using a 1-2 cm seam. Turn your bag the right side out, with your ribbon securely stitched on one side. Pop your present inside your finished bag, pulling the top of the bag together and neatly tie the ribbon. You can add a gift tag or finish with some festive foliage!
Share Your Thoughts & Projects With Us!
We would love to hear about your ideas for reusable fabric wrap in the comments below.
We always love to see how our customers use our fabrics and products in their creative projects – so please share with us on our Instagram or Facebook pages.
Here’s to plenty of merry craft making this festive season!!


I have been using fabric to wrap gifts for a while now but didn’t realise it had a name! The way I tie mine might not be same as Furoshiki but it’s just as effective.
Leave a comment