A Beginner's Guide To Making Your Own Clothes
How To Make Your Own Clothes
Making your own clothes is a great way of expressing your own style and creating pieces that are uniquely your own. If you’re a beginner to making your own clothes, it might seem a very daunting project to undertake. You might think you need to invest in a lot of equipment or know a lot of different sewing techniques, but starting to make your own clothes is absolutely possible for beginners. In our Beginner’s Guide To Making Your Own Clothes, we’ll take you through each step to getting started and provide you with some excellent online resources to help you.
How To Get Started With Making Your Own Clothes
We recommend choosing a sewing pattern that has been designed with beginner sewists in mind. Tilly & The Buttons Sewing Patterns have a fantastic range of patterns to suit beginners with clear instructions, step–by–step photography along with additional pattern support on her website. Tilly’s sewing patterns are award–winning for these very reasons and for helping to make clothes–making more accessible for beginners. Her designs are modern and stylish, so you’ll want to wear (and of course show off!) your new piece at every opportunity. Whether you fancy a new skirt, dress, shirt or pyjamas – take a look through Tilly’s beautiful collection here. Need some more inspiration? Check out Tilly’s Easy Projects For Beginners blog post for ideas.


What Is A Sewing Pattern?
A sewing pattern contains all the information and guidance you need to make your garment. There will be clear step–by–step instructions, accompanied by photos or illustrations, advice on suitable fabric for your garment, a list of tools you’ll need and the pattern template that you’ll use to measure and cut the fabric pieces for your garment. We recommend selecting your sewing pattern first before you purchase your fabric so you can ensure you buy a suitable material for the design.
What Will I Need To Make My Own Clothes?
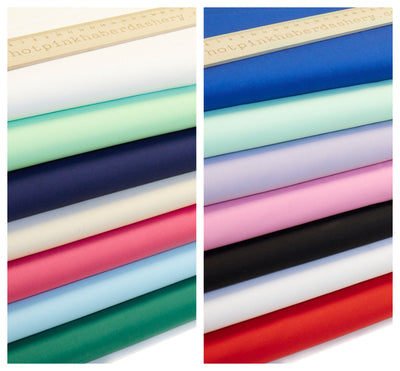
- Fabric – select a type of fabric that is recommended by the sewing pattern. A sewing pattern for beginners will suggest fabrics that are easy to work with, such as cotton. Also be careful of choosing patterns that would need matching, such as stripes, until you feel confident with the technique. Prefer to get a feel for your fabric? We offer a fabric sample service so you can check the look and feel of your favourite fabrics.
- Tape measure
- Dressmaking shears – for cutting your fabric accurately and neatly. Check out our range of professional quality scissors and shears here.
- Thread snips – for cutting loose ends of the threads.
- Seam ripper – A very handy tool that will easily pull apart seams if you make a mistake.
- Water soluble fabric pencil or dressmaking chalk – to temporarily mark the fabric while you work.
- Pins – for holding your pattern and fabric together as you cut and sew.
- Sewing Machine – before you start on your project, check your machine is running smoothly. If your sewing machine needs a little TLC, we have a full range of sewing machine accessories to help.
- Sewing machine needles – make sure you have the right needles and if you have been using the same needles for a while, consider replacing them to ensure the stitching runs smoothly. Browse our full range of sewing machine needles here. You can also find more information on sewing machine needles in our blog post “choosing the right needle for your project”.
- Sewing machine thread – whether you need a sew all thread or something more specialist, like a metallic or denim thread, check your pattern for recommendations. Head over to our threads section to find the perfect sewing machine thread for your project. If you’re buying your fabric with us, why not use our thread matching service to find the perfect colour thread for your garment!
- Pressing tools – You’ll need an iron and ironing board to press your fabric and seams so you can work accurately. If you’re a keen dressmaker, consider purchasing a sleeve roll or pressing ham to help with those trickier parts of the garment!


How To Start Sewing Your Own Clothes
Before you take the plunge to prepare and stitch your clothes fabric, take time to get comfortable again with your sewing machine. If you’re new to sewing and sewing your own clothes, Tilly and the Buttons has a number of online tutorials to help you get started with sewing. Whether you need to know more about how to set up your sewing machine or how to thread a sewing machine, Tilly’s step-by-step guides make the process clear and simple. If you’re a beginner or your sewing skills feel a little rusty, practise stitching some scrap fabrics. We have fabric remnant boxes that are perfect for this!
Now you have your fabric, your sewing pattern and the tools you need, it’s time to get started!
Step 1: Read your sewing pattern carefully.
Read your sewing pattern carefully so you can picture each stage – focus on tackling one stage at a time, so the project doesn’t feel overwhelming. For any techniques that are new to you or that you feel a little unsure about, find some online resources to guide you and practise with some spare fabric. Tilly and the Buttons provide extra pattern support for their sewing patterns on their website, where you can find sewing tips and tutorials for your Tilly sewing pattern. Our online glossary is a great page for any new sewing terminology or tools that you’re unfamiliar with.
How To Understand Sewing Pattern Markings
Before you start pinning your pattern to your fabric, check out Tilly’s guide to understanding sewing pattern markings. With step-by-step photos, Tilly explains the function of cutting lines, and how to work with marks such as darts and notches.
Step 2: Prepare your fabric and your sewing pattern.
Pre-wash your fabric so that if your fabric shrinks a little, you’ll avoid a finished garment that’s too tight – a risk if you wash for the first time once you’ve made your piece! Press your fabric so you’re working with a smooth surface to give you accurate measurements and shapes.
Cut out the pattern pieces and gently press the pattern if there are any creases or crumples. Find a large clean, smooth surface to lay out your fabric and your sewing pattern. Tilly has a step-by-step guide to laying out your fabric and pattern together here!
Step 3: Mark & cut out your fabric
There are a number of different tools you can use to transfer sewing pattern markings onto your fabric. We recommend testing your chosen tool on a scrap piece of fabric first just to be sure you can see the mark easily and that it will disappear when washed. Washable pens, tracing wheels with dressmaker’s carbon, chalk pencils and tailor’s chalk can all transfer sewing pattern markings onto your fabric and you can browse our full range here!
Now it’s time to cut your fabric! Ensure your fabric is completely flat and smooth on a steady surface and pin your sewing pattern piece to the material. Always use sharp, professional standard tools for cutting, such as dressmaking shears or a rotary cutter to cut your fabric accurately and neatly.
For more tips on this stage, follow Tilly’s guide to marking and cutting your fabric.
Step 4: Sew your fabric
It’s time for your garment to start to take shape – how exciting! Carefully follow your pattern instructions to guide you on what pieces to sew together and how to finish your garment. Tilly and the Buttons have a great blog post covering the basics of sewing construction, explaining everything from identifying the ‘right side’ of your fabric to what a seam allowance means.
We are always inspired to see our customer’s projects and hear your own tips, so please share with us on our Instagram or Facebook page. Happy sewing!!


I’m a beginner and very and what to learn how to sew thanks
Leave a comment