How To Start Sewing
If you’re new to sewing, it can be a little bit daunting to know where to start – the internet is a great source of information but there’s so much and how do you know what to do first?
To help you, we’ve put together this quick & simple guide to getting started with sewing in five easy steps. As you accomplish more and more projects, you can easily expand your sewing kit and space to accommodate your needs. Allow yourself to explore sewing and play with different types of projects, so you can enjoy your sewing adventure, being creative and most of all – have fun with sewing! Keeping your first projects fun and fairly simple will give you the motivation to keep sewing! Before you know it, you’ll find yourself tackling more complex projects as your knowledge and experience grows.
1: What Are You Going To Sew?
If you’re getting started with sewing, you’ll probably have an idea of something you’d like to make or an area of sewing you’re keen to explore. It might be that you’re planning to make a tote shopping bag, a piece of clothing or a home decor item. Whatever you’re interested in, use this as a basis for setting up your sewing kit and organising your sewing space. That way, you won’t be spending money on tools and equipment you don’t need until you’re ready. Once you know what you’d like to sew, research how to make your project – do you need some guidance? Can you follow an online tutorial if needed? Or do you prefer to attend a local sewing class? By considering how you approach your first sewing project, this will ensure you enjoy it and will help to make it a success!

2: What Sewing Tools Do I Need To Start Sewing?
The biggest consideration will be whether your project can be hand stitched or if you need a sewing machine. If you are planning on using a sewing machine but a little unsure about the investment, find out if you can borrow or hire a sewing machine locally.
Let’s take a look at what you need to put in your basic sewing kit. It’s useful to have a sewing box or basket to organise your tools and keep everything in its place. We have a great range of sewing storage solutions to suit all kinds of budgets – browse our sewing boxes and baskets page here! If you’re planning a specialist project, such as a quilt or a piece of embroidery, you’ll need some additional tools so check your project requirements. We have an extensive range of specialist tools, from quilting templates to embroidery needles, in our haberdashery department so you can find all you need in one place!

What To Put In A Sewing Kit:
1: Sewing machine & hand sewing needles:
Even if you’re planning on using a sewing machine, it is useful to have a set of hand sewing needles in your kit. Also make sure to check what sewing machine needle you need for your project and the fabric you’ll be working with. We have a great range of specialist sewing machine needles and, if you’re not sure which needle to use, read our guide to ‘Choosing the right needle for your project’.
2: Flexible tape measure:
A tape measure is essential for measuring and cutting material. Buying a flexible tape measure means that you can, of course, use it on any surface or shape such as for checking body measurements.
3: Pins & pin cushion:
You’ll use pins to secure fabrics and other materials as you work, prior to stitching to help your pieces stay in place. We stock a wide range of pins to suit all types of work – from dressmaker’s pins to glasshead pins, which are easy to see and remove. We also stock fabric glues – a handy way to temporarily secure hems and materials as you work. You can also browse our range of novelty pin cushions here – we have everything from alpacas to miniature sewing machines!
4: Dressmaking scissors or a rotary cutter:
When cutting fabric, you’ll want to ensure the cut is neat, clean and quick which is why a good pair of scissors or a rotary cutter is an essential sewing tool. We have an extensive range of specialist scissors and cutting tools – so you can find the perfect tool for your job!
5: Fabric pens or pencils:
When you need to mark or add template guidelines to your fabric, there’s a huge selection of pens, pencils, chalks and transfer pencils to choose from!
6: Thread snips:
Thread snips are a neat little set of scissors to finely cut loose threads with ease. They’re an inexpensive tool to add to your kit and you’ll find they’ll snip threads closely with ease! Browse our scissors and cutters page to see our range of thread snips.
7: Seam ripper:
A seam ripper is a handy tool to keep in your sewing box. From time to time, even the most experienced sewist will need to undo some stitches which is where a seam ripper will make the job effortless and avoid damaging your fabric. Shop seam rippers here!
8: Thread:
Threads are available in all the colours of the rainbow and with different qualities to suit your project or material, from Gutermann Sew All threads to specialist threads for stitching quilts or fabrics such as denim. We also provide a thread matching service when you buy your fabric with us – find out more here! Browse our full range of threads here.
9: Fabric:
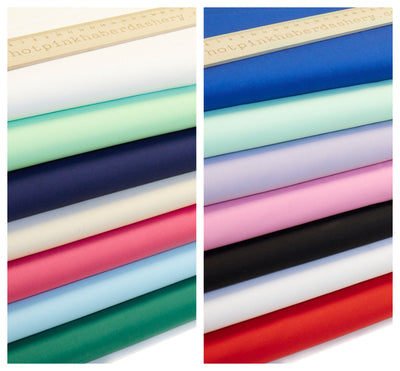
Your choice of fabric is where you can make a project uniquely your own! Check your project requirements for any specific fabric guidelines, qualities or weights and then browse our fabric section to find your perfect print or plain! We have everything from heavyweight canvas fabrics to cotton poplin prints and lightweight polycottons. If you’re new to sewing and want to practise machine stitching, check out our boxes of remnants – these are ideal for small scale projects as well as sewing practice.
10: Iron & ironing board:
You’ll need to work with pressed fabric so that your measurements are accurate and your project looks neat. An iron and ironing board will be essential for getting your fabric ready as well as pressing hems and seams as you work.

3: How To Set Up Your Sewing Space
Depending on the space you have available at home, you may have a room you can dedicate to sewing or you might be using your kitchen table. Wherever you’re setting up your sewing space, there are a few handy hints to help your projects run smoothly.
Work In Good Daylight:
Working in daylight will really help you to see your work in detail and see colours correctly, so it is ideal if you can position your sewing table next to a window. However, of course, this isn't always possible. Alternatively you can use a natural light lamp or switch to daylight bulbs to help you see your work in the best possible (day)light!
Create Easy To Access Storage Space:
Modular units can really help you to organise your sewing space – keeping fabrics, patterns, materials and tools within easy reach, on view and in order at the same time. Your sewing box or basket will hold your essential sewing kit and you can move this from room to room. Otherwise, storage boxes, tubs and mason jars are an easy and inexpensive way of keeping small notions, like trims and buttons, together and tidy.
The Sewing Space Triangle:
If you do have a dedicated sewing space, consider organising your main work stations into a triangle format – so your ironing board, sewing table and cutting mat make the three points of a triangle in your room.
4: Getting Ready To Sew
Now you have all your tools ready, you’ll want to make sure you feel confident to start work. If you’re using a sewing machine, check that you have the correct needle and thread for your project. Read our guide ‘Choosing the right needle for your project’ to help you. Next you’ll need to thread your machine and practise lowering and lifting the presser foot – if you’re unsure about this step, take a look at an online tutorial to help you. Tilly & The Buttons have a great series of step–by–step online guides for beginners to help you get ready to sew, such as their ‘how to stitch’ guide and ‘how to thread your sewing machine’. If you’re planning on making your own clothes, then check out Tilly & the Button’s award–winning sewing patterns here.
If you’re going to be hand stitching your project, practise some key hand stitching techniques on some pieces of scrap fabric. You can find plenty of online tutorials for different hand stitching techniques such as these guides from lovecrafts and gathered.com.
5: Start Your Project!
Now you're ready to start your sewing project! You have your sewing kit ready and your fabric. Our haberdashery department includes a great range of specialist tools and equipment so you can find all you need in one place.
Do you have any recommendations for beginners? Any essential tools you recommend adding to a sewing kit? Add your comments below, we’d love to hear from you!
We also have a handy sewing glossary on our website – so if you come across a sewing term or product you’re not familiar with, head to our glossary for more information!


Leave a comment