


How to sew a linen-style shirt without a pattern
Are you new to making clothes? Given it a few goes with little success? Maybe you’ve never done it before but looking at a way to start..? No matter your motive, we’ve pulled together a fab little guide on how to make one of this year’s most wanted wardrobe staples in the simplest way possible - a linen-style shirt.
Making your own shirt is a really good place to start your journey of clothes making because the design is so simple as is the construction - there’s no gathering, zips, buttons or interfacing! You’ll also end up with a really beautiful shirt that you will be proud to wear for the rest of the summer (and hopefully beyond!).
Without further ado, let’s get sewing!

What you’ll need…
- Sewing machine
- Pins
- Iron and ironing board
- Fabric scissors
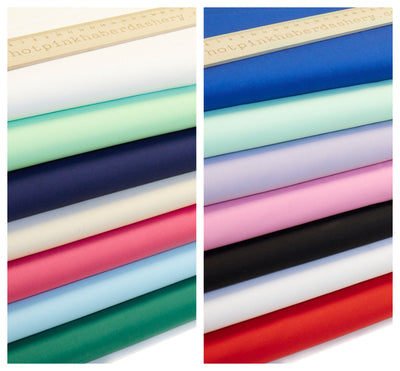
- Fabric - take a look at our fab range of fabrics to find your favourite
- Coloured thread
Trace and cut your pieces
One thing that makes this style of shirt super easy, is that it’s made from two easy pieces. The sleeves are integrated into the body of the top so you don’t have to deal with separate pieces. Whilst tracing and cutting your pieces without a pattern may sound a little scary, fortunately this shirt is very forgiving so don’t worry too much about any mishaps! However, to make it a little easier for you, go through your own current tops to see if you can use them for a reference; such as a neckline you really like or the width of another one. This is your own shirt so make it as bespoke as you can!
First of all, fold your fabric in half length-wise before sketching out the front of the shirt. Sketch your line for the actual edge of the shirt and then another one slightly outside that will be your cut line. When your line meets the fold, try to ensure that it’s perpendicular at that point, or you’ll end up with a ‘V’ when you unfold it. Sketch and make adjustments until it’s perfect (just do the front piece first) and then you can cut! Once you’ve cut this first piece, trace around it for the back piece, bearing in mind that you’ll probably want the neckline to be a little different and the hem too. Repeat the above and you should have the two sides to your shirt!
Some of our favourite summer fashion fabrics:

Shoulders and sides
Now your sewing machine comes into play! Thread it, fill the bobbin and practice your straight and zig-zag stitching on a piece of spare fabric.
Starting with the shoulder seams, put the right sides together and pin the seams to ensure the fabric doesn’t slip out of place. It doesn’t matter if your edges don’t completely match up because you can just trim them after you’re finished. Once you’ve gone along and sewn the shoulder and side seams, go back and zig-zag stitch in the seam allowance, which will keep the linen from fraying too much.

Sleeve hems
Time to get your iron out! We want to aim for a double fold hem, so go around the bottom edge, folding and pressing an amount of the raw edge towards to the wrong side of the top. Once you’ve gone around once, go round again, folding and pressing as you go along to hide the raw edge.
Next, you want to move onto the armholes. These are slightly tricker but still totally manageable. Flip the edge over and press so that it’s nice and neat. Do this twice, just as you did with the bottom hem and then sew the hems down (we recommend pinning before sewing).

The neckline
We’ve saved the hardest bit for last which is good because you will have had practice! Usually, we would say that necklines need bias binding, but as we’re making this as simple as possible, we’re just going to be using sewing machine and iron!
First of all, pre-sew an edge all around the neckline through a single layer of fabric, so not actually sewing anything together. Using this sewn line as a guide, press the fabric in towards the wrong side. Once you get the whole way round, fold and press again (like with the sleeve hem and armholes). Now, slowly and carefully stitch your way around the neckline - be sure to avoid creating any pleats in the fabric, you can do this by continuously flattening the material out. Throughout this whole process, keep the iron sideways from the bottoms towards the neckline.

Final iron and finale!
Once our neckline is done, you can try it on! Iron it first, ensuring that every stitch is in place - if not, don’t be afraid to take out and redo an area. If it all fits fine and everything looks good you can give yourself a big pat on the back! To ensure it looks the best it can possibly look, we recommend giving it a wash and then hang dry so that the material and stitches are loosen up.
Next - style it up and wear it out!

Leave a comment