


How to make your own pyjamas
For us, autumn and winter evenings are all about snuggling up on the sofa with the family, sipping on hot chocolate whilst wearing your favourite PJs and watching a good film (that usually gets debated for a good half an hour before it finally goes live!). With longer nights making staying in all the more inviting, we think it’s important to highlight everyone’s favourite autumn and winter attire… Pyjamas!
No matter how old or how young, how big or how small, pyjamas are a friend and comfort to all. This year, we think you should have a go at making your own pyjamas for you, your family and other people on this year’s Christmas gift list too! You can make them highly personal and rest easy knowing that you’ve given yourself or someone you love a gift that will be well and truly be appreciated.
We’ve pulled together a step by step guide on how to make your own pyjamas in the hope that it will bring you and your loved ones a lot of joy!

Pyjama Bottoms
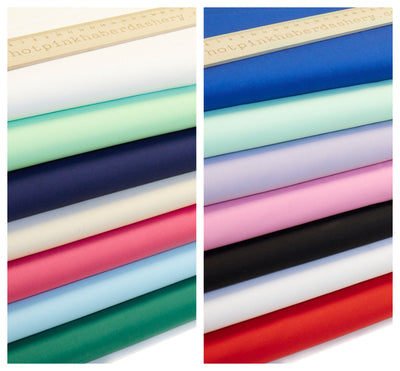
Step One: Pick your fabric
The best part! One of the most appealing things about making your own pyjamas is that you can go crazy on picking which fabric you want to use. It can be as bright, as garish, as subtle, as plain, as pretty, as manly as you want it - anything goes. Check out our range of fashion fabrics that would be perfect for the job…
Step Two: Choose your pattern
You will need two patterns - one for the pyjama top and one for the pyjama bottoms. Choose a pattern that can be used for both children and adults so that you can re-use it for multiple creations
Step Three: Cut your pattern
This part is pretty simple - you just need to cut two fronts and two backs! Once the pattern is cut, label the front and back pieces with a removable method (this applies for top and bottoms)
Step Four: Sewing!
First of all, you need to sew the inner leg seam by pinning the right sides of a front and back together at the inner leg seam - do this again with the other front and back. The back should be a little deeper in the crotch to allow for sitting and have a slightly higher rise in the back too.

Step Five: Leg sewing continued…
Open up the leg pieces that you’ve sewn together and then press them so that the seam is flat. From here, match up the inner leg seams which will shape it like the letter U - pin this together before stitching
Step Six: Finishing the legs
Make sure the right sides together match up with the two side seams. When it does, pin it so that they start to look like pyjama bottoms! Stitch the front to the back at the side seams, press open the seams and then turn them inside out
Step Seven: Elastic waist
One of the best things about pyjamas is their elasticity! Fold the upper edge around an inch and a half towards the inside and then press the edge. It’s best to make the elastic loose for comfort so we suggest adding in a tie (to stop them falling down!). It’s up to you what kind of elastic you use - just please make sure it’s covered and not just raw elastic! Measure how long the elastic is and then create two small incisions at the front so that the elastic can come out and meet
Step Eight: Finishing the elastic waist
Knowing how long to make your elastic can be quite tricky but we find the best way is to measure an inch below the waist of the wearer and then cut the elastic one inch larger than that measurement. From here, use a big safety pin and put the elastic into the casing and thread it all the way around until it comes out. Then, overlap the elastic by around an inch and pin! Carefully stitch using a zigzag stitch before sewing the opening mostly closed so that it will come through the front and not slip away
Step Nine: Hemming
The final stage of creating your pyjama bottoms is hemming! To do this, you will need to measure the wearer from the waist to the floor. Mark this length and then turn the material under just as you did for the elastic casing. Now, trim away any excess material until the hem allowances is around 1-2 inches. Fold this edge and then press it before stitching the pressed under edge to create a nice, neat hem.

Pyjama Top
Step one: Pick your fabric
This should probably (although, there are no rules!) either match the material of your PJ bottoms, or compliment it by being the same colours - or plain colour. Check out our cotton fabrics for breathable, comfy pyjama top material
Step Two: Prep your fabric
Once you have chosen and cut out your pattern, lay out your fabric on a hard surface before folding it in half so that the selvages are together (aka the edge of the fabric). Keep the right sides facing each other (the outside of the fabric) and then lay it out as smooth as possible.
Step Three: Cut your fabric
Line up your fabric against the pattern and pin it down so it doesn’t move. Then, cut the fabric making sure you hold it down with one hand. Take your time and use long strokes whilst keeping the scissors at a 90 degree angle
Step Four: Sew the shoulders
Take both the from and back pieces of your top and line them up, ensuring that the right sides are facing each other before pinning them together at the shoulders. Sew the shoulders together using a straight stitch and when you’re finished, iron out the seams

Step Five: The neckband
You want your pyjama top to be super comfy so ensure you have a relatively low and loose neckband. You should have a separate bit of material for this so use the bit you cut from your pattern and sew the two short ends together using a straight stitch - your neckband should now be a nice loop. Fold the neckband in half lengthwise with the wrong sides together and then pin the edges before sewing them together using a narrow zig-zag stitch
Step Six: Attach the neckband to the top
Lay the top out open and flatten the shoulders to pin the neckband to the neckline on the right side of the fabric. Then, pin the neckband on the shoulders first before the centre and back. Now it’s time to sew! Use a straight stitch or zig-zag stitch that will stretch with the fabric. Sew once section at a time and remove the pins as you go along - make sure the fabric of the top isn’t pleating beneath the neckband. Once all sewn on, run an iron over it to press the seams
Step Seven: Stitch the sleeves
Lie the top out flat and pin the middle of the sleeve curse to the middle of the armhole - make sure you keep the right sides of the fabric together. Next, pin the sleeve along each side of the armhole and use a straight stitch to sew the sleeve on; repeat with the other sleeve. Once both your pyjama top sleeves are attached, iron the seams out
Step Eight: Sew the side seams
Keep the right sides of the fabric together and pin along the sides of the top - the sleeve sides first and then work your way down to the hemline. Again, use a straight stitch to sew the sides of the top together, working your way from the top down. Fold around half an inch to an inch of fabric under the bottom edge of the top and iron it down - use a straight or zig-zag stitch again to sew your hem and then press the hem one more final time!
At the end of all of this (and well done to making it to the end!), you will have a perfect pair of personalised PJs!

Leave a comment