


How To Make Fabric Pumpkins
As the days become cooler and shorter and we start to spend more time indoors, this is the perfect opportunity to get crafting and making! If you want to unwind and wile away a few hours with some autumn projects, we think this is a beautiful one to get started!
More people are embracing the changing seasons with seasonal crafts and home decor, such as fabric wreaths for the front door and changing displays on the mantelpiece or doorstep. If you have young makers at home, this project is a great way to keep them entertained and engage them in the changing seasons.

Why Make Your Own Fabric Pumpkin?
Now, you might think that a fabric pumpkin is just for Halloween, however with the right choice of materials it can last all autumn – plus, it looks so effective that you’ll want it to stay around longer! Fabric pumpkins are easy to make so you can create a series of different sizes in complementary prints and materials, then add in some Halloween print fabric pumpkins in October, ready for the spookiest day of the year! You can get creative with different colours, prints and sizes making a beautiful, seasonal pumpkin display for the autumn.
So let’s get started with how to make fabric pumpkins!

How To Choose Fabric For Your Pumpkins
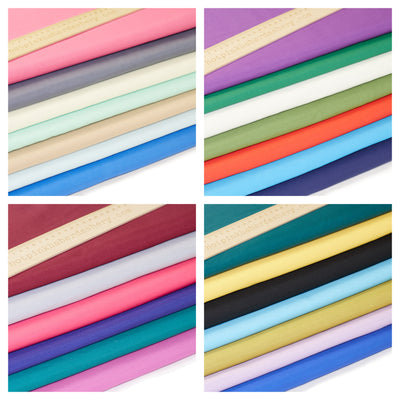
To begin with, consider the number and size of the pumpkins you wish to make and then think about your colour palette and print choices. Do you want to use some cotton Halloween fabrics or a mix of classic prints and plains? Perhaps you’ll add some Halloween print fabrics later in the season and, for now, want to make a beautiful autumnal display. We love the combination of checks, ginghams & polka dots chosen by Crafty Morning for their fabric pumpkins. Polka dots, stripes, florals and ginghams can make a beautiful set of pumpkins and if you’re worried about too many prints, you can always add in a plain cotton or polycotton to break up the patterns. Here’s a few print combinations that would make your fabric pumpkin display look stunning –
- Funky, retro pumpkin fabrics – How about our seasonal leaves print, matched with our cotton gingham fabric & our retro stripes?
- Wild flowers pumpkin fabrics – Another beautiful choice with a wild country garden feel, would be our wild flowers paired with our polka dots.
- Dots, checks and stripes pumpkin fabrics – We love a classic print mix and we think our ticking stripes, with our polka dot neutrals and cotton gingham would look so pretty and welcome the new season beautifully!
- Halloween pumpkin fabrics – If you’re looking at Halloween print fabrics then our skull fabrics, such as our Day of the Dead and Skulls and Roses would look great with classic stripes or spots or combined with our other Halloween print fabrics. The Halloween vampire bats, Dancing Skeletons and Spooky Halloween Spiders are all ideal designs to combine with other prints for your pumpkin fabrics.

What Do I Need To Make Fabric Pumpkins?
The good news is that this project just calls for a few essential sewing tools and some simple materials. Here’s what you’ll need to make your fabric pumpkins –
- Your choice of cotton fabrics
- Brown felt (for the pumpkin stem)
- Sewing machine or hand sewing needles
- Good, sharp fabric scissors
- Fabric glue
- Removable pen or chalk
- Twine or embroidery thread
- Measuring tape or ruler
- Batting (to fill your pumpkins)
How To Make Fabric Pumpkins
Here’s our guide to making easy DIY fabric pumpkins! This is an ideal project for beginners but the results are so effective that it’ll appeal to experienced makers too!
1: How To Make A Template For Your Fabric Pumpkins:
It is handy to make a template for your fabric pumpkins as you’ll need to cut your material on the bias. On a piece of card or paper, draw a rectangle that is twice as wide as it is high. A template of 18cm x 36cm is ideal for medium size pumpkins. Next, find the centre point of your template by drawing a vertical line in the centre of the rectangle and a horizontal line across the middle of the rectangle. From the centre point draw an arrow at a 45 degree angle, this will help you to cut your fabric on the bias. Check out Made To Sew’s great step–by–step photos for making a template for your fabric pumpkins.
2: How To Cut Your Pumpkin Fabric:
Position your fabric with the right side up and place your template on top. Looking at your 45 degree arrow line, turn your template until the arrow runs parallel to the grainline in your fabric. Your template will be sitting at an angle across the fabric now.
Draw around your template using a removable pen or chalk and cut your pumpkin fabric with a good, sharp pair of fabric scissors.
3: How To Sew Your Fabric Pumpkin:
Fold the rectangle in half, with the right sides facing into each other, so the short sides meet. Carefully pin and then stitch the short sides together, using a 5mm seam allowance along the edge.
Open your fabric so you have a fabric tube with two circular holes at either end. Sew a gathering stitch around the bottom edge of your fabric, sewing all the way around about 5 mm from the edge and leaving long pieces of thread at either end. Another inner row of gathering stitches, about 1cm from the edge, is recommended to make the gather really effective.
Next, pull on the loose end pieces of thread from one side to cinch the fabric closed and create the base of your fabric pumpkin. Using a needle and thread, take the long loose ends of thread and sew through the gathered fabric to close the hole. Turn the fabric to the right side out, ready to fill your pumpkin!
4: How To Fill Your Fabric Pumpkin
Using batting, fill your fabric pocket until it's almost full so you have space to complete another set of gathering stitches and close the pumpkin at the top. Repeat the two rows of gathering stitches around the top of your pumpkin fabric, leaving long loose ends of thread ready to pull the pumpkin closed. As you pull the threads to close your pumpkin, add any more batting you need to ensure the pumpkin is full and the fabric is smooth. Close your pumpkin by sewing the ends of your gathering stitches through the hole, as you did on the bottom of your pumpkin.
5: How To Create Ridges In Your Fabric Pumpkin
Using a needle with a large eye, thread your twine or embroidery thread through the centre of your pumpkin then out and down one side, back through the centre and down the opposite side. Work your way around the pumpkin so it is divided into six or eight equal segments, pulling the twine securely as you work to create the ridge shape.
6: How To Make A Stem For Your Fabric Pumpkin
There are a few options for making a stem for your fabric pumpkin, including using a real stem! We love a rolled felt stem as it complements the fabric so well! And, of course, you can choose any colour stem you like to match your chosen pumpkin fabrics!
Draw a rectangle on your felt, using the chalk or removable pen, that is twice as wide as it is high. A rectangle of 6cm x 3cm is ideal for a medium size fabric pumpkin. Cut out your rectangle and very tightly, roll your felt horizontally to make a solid felt stem. Seal the end of the felt closed with some fabric glue. Attach your stem to the centre of your fabric pumpkin using either fabric glue or some stitches.
And ta–da!! Your fabric pumpkin is complete! Such a simple but beautiful project to make and with so many fabric options, you can be endlessly creative with your fabric pumpkin display.

Fabric Pumpkin Photo Tutorials
There are a wealth of fabric pumpkin tutorials online, with step–by–step photos to guide you, as well as video tutorials to follow. Here are some of our favourites!
Made To Sew – With beautiful, clear photos and a video tutorial, Made To Sew shows you how to make easy DIY fabric pumpkins.
Ageberry – This is a great page to get more ideas for adapting and trying different fabric pumpkin tutorials, including using real pumpkin stems and how to cover real pumpkins with fabric.
Apple Green Cottage – If you love patchwork, why not make this gorgeous patchwork fabric pumpkins inspired by Apple Green Cottage. Our charm pack fabrics would work beautifully for this project with a lovely selection of patchwork squares already curated, cut and ready to go!
We always love to see our customers’ work, so do share with us on our Instagram and Facebook pages too!
Leave a comment