


How to make a Summer Midi Skirt
Whilst we’re not sticklers for fashion here Hot Pink Haberdashery; we’re more of the idea that you should wear what makes you happy – the more unique the better! However, one trend that we have become huge fans of this year is the midi skirt.
The midi skirt popped up on our radar towards the end of last year but now that spring is here, we’re seeing them everywhere – in the park, at the beach, in the shops, at bars, on the school run… The list goes on! Midi skirts are lightweight, comfy and especially great for mums who like wearing skirts but sometimes don’t get the chance to when running after or rolling around with kiddies. They can be dressed up or down and worn for so many different occasions that we think having one or two in your wardrobe this summer is pretty much vital!
You can go into any high street shop or online clothing store to find your midi skirt OR you can of course (drum roll please) make your own skirt! When you make your own clothes, you’re opening up a world of style possibilities. Skirts can sometimes be a bit tricky to buy as you can’t control the exact length, waist size or fabric. By making your skirt yourself, you can control all of these precisely! (as well as saving money and help to fight against the fast fashion industry).

We’ve created a guide to help you make your very own button down midi skirt that will be the centre piece and pride of your wardrobe this spring and summer. So, let’s get started:
What you will need:
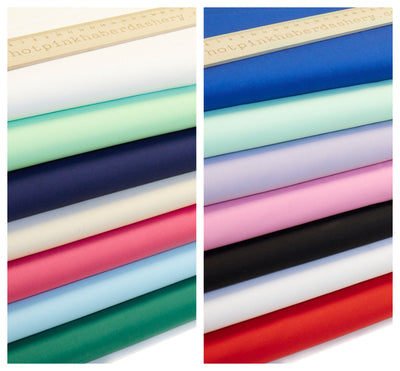
- 2 metres of lightweight fabric. We have a fantastic range of fabrics, including beautiful cotton fabric which would be perfect for this
- Matching thread. Check out our crafts section for this
- 1.5 inches of wide elastic - 1 to 8 buttons. Have a look at our eclectic range of buttons to buy and pick yours
- Chalk
- Buttonhole foot for your sewing machine
Cutting to prep
First of all you need to cut all of your pieces of the skirt. You need a big piece for your skirt and three additional cuts for waistband. To give you an idea, your skirt piece dimensions should be:
Width: Your waist measurement x 1.5 (or x2 if you want it to be a more fuller skirt – we’re big fans of the 50s look!)
Length: As long as you’d like! It’s worth holding the material up to you and marking with chalk where you would want it to be on you. For the modern midi skirt look, it should sit in the middle of your shin. However, it can be shorter or longer depending on what you think is most flattering for you and how you would like it to look.

Working out the waistband
We’re starting with building the waistband. You will need your three waistband pieces and your elastic. Cut the elastic around 3 inches shorter than the length of your waistband back piece before stretching the elastic and pinning it on either side of the waistband back piece.
Next, you need to sew the waistband front pieces. Sew them together on the side seams on each side so that you are simultaneously attaching the elastic. Once this has been completed, you need to fold the entire sewn waistband in half, ensuring that the elastic is inside.
Sorting the skirt
Once your waistband is completed, you can start concentrating on the skirt (keep the waistband to hand though). So, get your skirt material and sew a basting stitch seam along the top of the skirt piece before gathering the skirt evening until the width matches up to the width of your waistband. When the right sides are together, sew the skirt to the waistband – it should now start looking more like an item of clothing!
You then need to iron your waistband up so that it lays flat. Once this has been done, take the front panels of the skirt and fold them both over twice. You will need to measure these folds to ensure they will line up in front of the skirt when you put the skirt around you so that it fits and so the buttons are in the right place. Make your folds larger or smaller accordingly so that they line up perfectly.

Bracing for buttons
Once you’ve made sure your skirt is the perfect size for you, sew it in place with a straight stitch. If you have chosen a more lightweight fabric, you can add a strip of interfacing inside the folded edge to give it some structure and stability.
Now it’s time to make room for your buttons! Mark the placement of your buttons (and buttonholes) with your chalk so you know exactly where they’re going to be. How many buttons you choose to put on is up to you; some people will like them running almost to the bottom, others half way and others to the knee. Once you’ve decided where your buttons are going to go, use your buttonhole foot to insert the button holes on one side of the skirt.

Once you’re happy with your how it all looks so far, grab your old needle and thread to sew your buttons in place on the opposite side of the skirt.
Ta da! You have your skirt!
However, make sure you try it on before you start celebrating and make any adjustments there and then. Once you’re completely happy, put the skirt on and head out to show it to the world… You deserve it!
As usual, be sure to send us in any pictures of your skirt – we’d love to share some on our channels.
Leave a comment