


How To Guide: Making your own Summer Dress
Summer is so close we can almost taste it! We’re talking barbecues, Pimms, freshly cut grass, shoeless feet, picnics and floral everything.
The spring and summer months are the ideal time to start working on some haberdashery projects that you can then utilise throughout the sunny seasons. Over the next couple of months we’ll be giving you a few how-to guides to give you some summer project inspiration but today, we’re going to focus on how to make your own summer dress!
Creating a new summer wardrobe is exciting enough when you’ve just bought your items on the high street, but it’s a hundred times more exciting when you’ve made your summer garments yourself, and what better place to start than with a beautiful summer dress?
So without further ado:
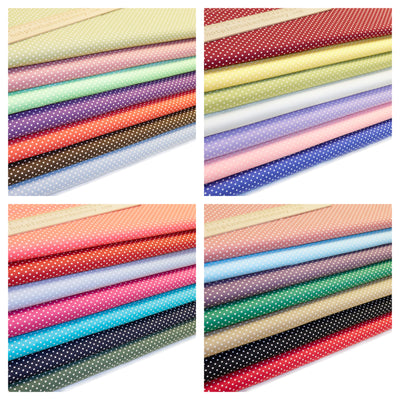
Step 1: Choose your fabric
We recommend opting for cotton fabric as it’s great for letting your skin breathe, it’s light and is the ideal fabric for a summer dress. We have a lovely selection of spring themed fabrics that would be perfect for a dress, whatever your style.

Step 2: Select dress pattern
Dress patterns make creating your dress much easier than working it out from scratch. Patterns are the specific measurements and shapes for the different parts of your dress that will need to be cut in (even if you’re going for a shift-style!). You can find these at most craft shops, and when picking, make sure you choose one that will fit and suit you. Alternatively, you can use a dress you already have and trace it to create a pretty identical fit and shape.
Step 3: Take your measurements
If you’re using a dress pattern, use the guide that it will have given you to take your measurements - make sure to use a soft tape measure. If you’re using another dress as your inspiration, fold it in half lengthwise and then place it over your chosen fabric which should also be folded lengthwise too and then trace around the outside!

Step 4: Cut your fabric
Follow your trace lines with scissors. Make sure you add half an inch of extra fabric around the seam - some patterns will mention this but some may not. If you’re adding sleeves to your summer dress, these will have to be done separately so cut your fabric into a tank style top and then sew the sleeves on later. At this point, it’s important to cut the back of the dress as well, using the same method as you did for the front.
Step 5: Sew
If you’re using a pattern, they should have given you sewing directions but in general, the sides of the dress will be sewn together first. To do this, turn the fabric inside out and fold a quarter of inch over on both sides then use a zigzag stitch to sew the from and back together. Now, do a top stitch to attached the seam to the main body of the dress.
When it comes to the neckline, fold over a quarter of an inch of frankc along the edge and use and iron to flatten it nicely. Use a simple straight stitch for the collar in order to keep the edges in place and discourage them from fraying. This is the time to adjust the neckline depth.
Step 6: Hemline time
Adding the hem is the final touch to your dress. Again, fold over a quarter of an inch of your fabric and then iron it down nice and flat. If you have one to hand, use a serger to secure the ends of the fabric and stop it from unravelling. After, create a straight stitch to connect the folded edge to the bottom of the dress. This way, you (hopefully) shouldn’t make any mistakes.
Step 7: The finishing touch
There are lots of little adornments you can add to your dress to give it an even more unique touch. You can add a zip to the side of back to your dress, choose some sort of lace overlay, beading, patchwork squares for a Pippi Longstocking feel, or a ruffle trim. It’s your dress - go wild!

This is a super simple guide to creating your summer dress, and if you’re a first timer, we recommend purchasing some more in depth instructions either from your dress pattern producer or checking out some Youtube videos that can talk you through it in more detail!
Now go and get ready for summer!
Leave a comment